
In the digital landscape, the smallest details can significantly impact user experience. One such detail is the customization of error pages. Default error pages, while functional, are often stark and uninformative, leading to a subpar user experience. Custom error pages, on the other hand, can turn an accidental misstep into a positive interaction with your brand. In this guide, we’ll discuss the process to create custom error pages in cPanel, one of the most popular web server control panels.
This blog is a part of our cPanel server management services where we make sure your cPanel server works efficiently with any issues.
Understanding Error Pages in cPanel
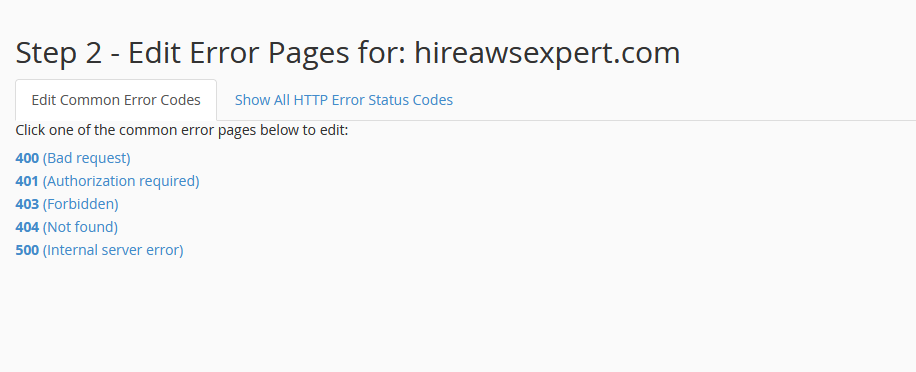
Before getting to the steps, it’s crucial to understand the types of error pages and when they appear. The most common error pages include:
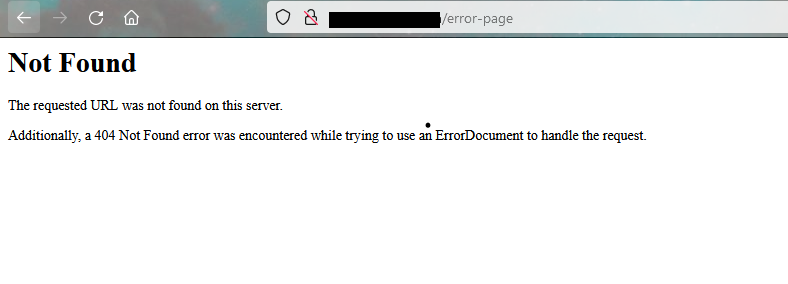
- 404 Not Found: The server can’t find the requested URL.
- 403 Forbidden: Access to the requested resource is denied.
- 500 Internal Server Error: A generic error message for unexpected conditions.
- 502 Bad Gateway: The server received an invalid response from an inbound server.
- 503 Service Unavailable: The server is temporarily unable to handle the request.
Why Create Custom Error Pages in cPanel?
Custom error pages fix the issues with the basic, default error pages that servers show. They can give more useful information and can be designed to match the look of your website.
If someone lands on a “page not found” error but sees your site’s navigation, they might choose to click on another link instead of leaving. A plain, default error page might make it seem like there’s something wrong with your site, pushing visitors away. That’s not what we want.
It’s a good idea to create these custom pages for all the common errors and even for some that might be unique to your website.
Steps to Create Custom Error Pages in cPanel
Follow these steps to create a custom error page in cPanel:
1. Sign into your cPanel account.
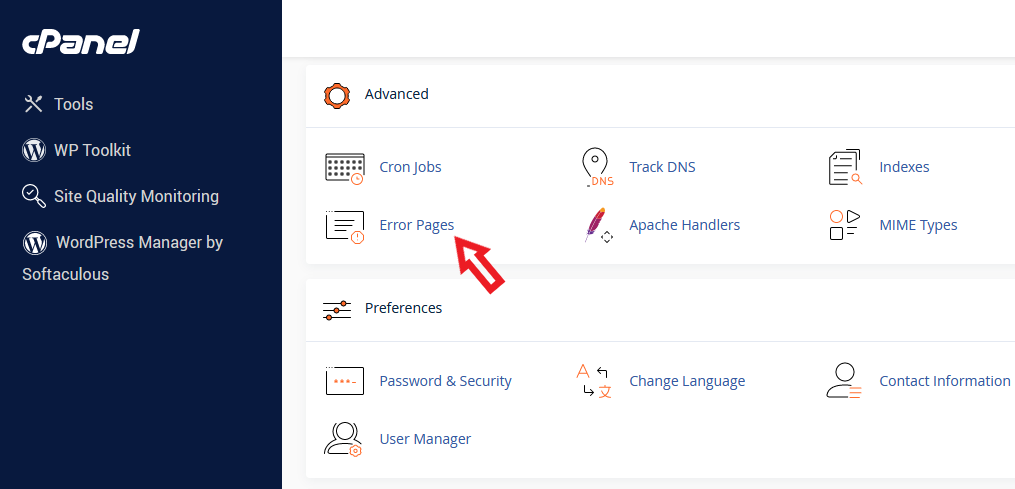
2. Go to the “Advanced” section and find the “Error Pages” icon or link. Click it.

3. If you’re managing multiple domains in cPanel, pick the domain you want to set up a custom error page for.
4. Choose the error you’re creating a page for by clicking on its error code link. Let’s work on making a page for the “404 (Not found)” error as an example.
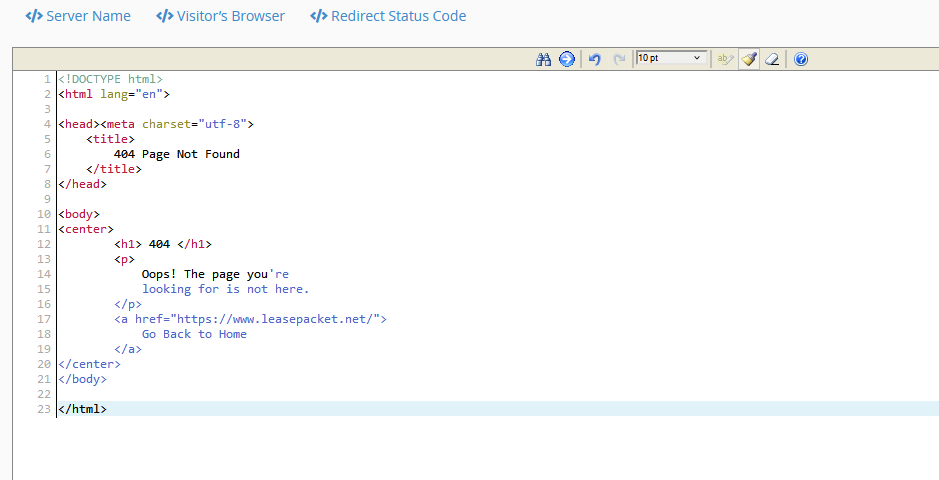
5. You’ll be directed to an editing area, which starts off empty.

6. Begin by adding your page’s HTML code. You should include everything a standard page on your site would have, like the header and body tags. Essentially, you’re setting up what looks like a blank version of your site’s page.
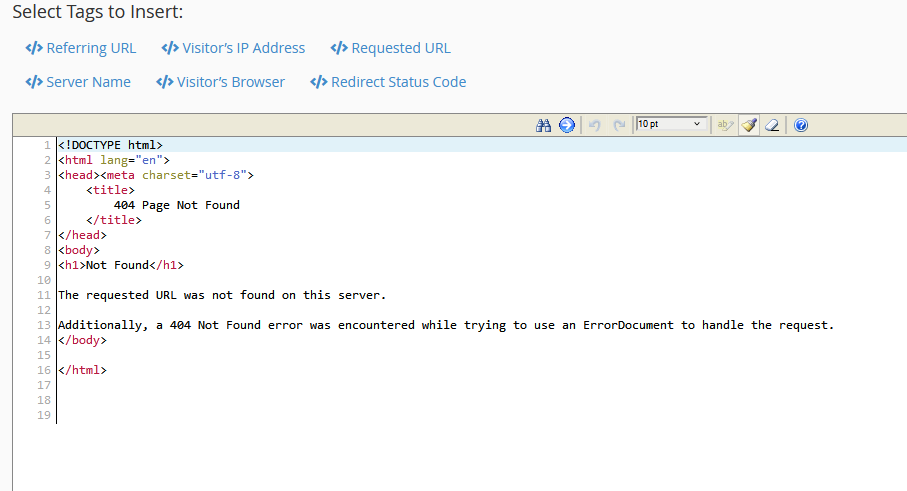
7. Look for the “Select Tags to Insert” section. It has various variables that you can use on your custom error page.
8. For a “404 (Not found)” page, we’ll incorporate the “Requested URL” variable to display the missing link on the page.
9. Move your cursor to where you want to add the variable within your code and click on the tag link to insert the variable code.
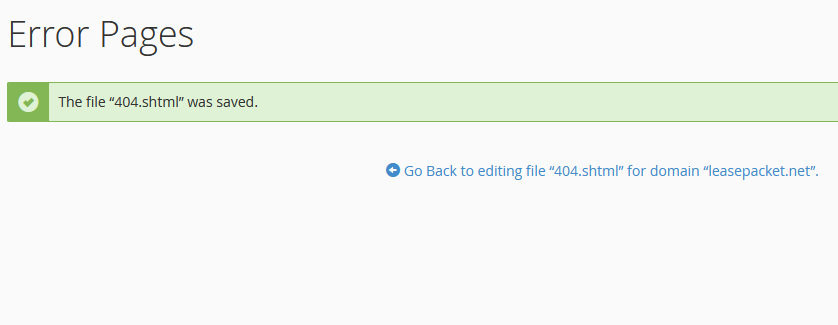
10. Once you’re done, scroll down and hit the “Save” button to apply your changes.
After setting up your page, you’ll see a message confirming it was successful.
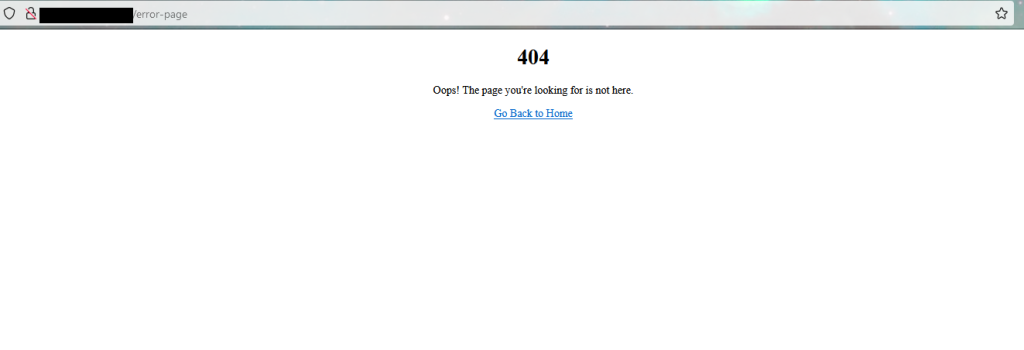
Now, if someone visits your site and types in a wrong URL, they’ll be greeted with the custom error page you created.
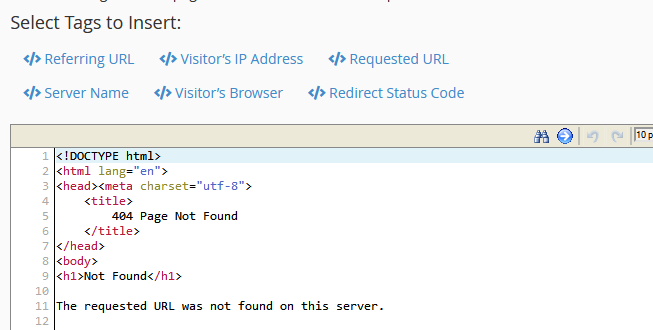
By default, this error page looks quite basic. To improve it, consider adding some clear explanations.
You could include an H1 title to catch the visitor’s attention, followed by a brief explanation. Don’t forget to format the variable tag code properly to make it look neat. Also, it’s a good idea to include a suggestion encouraging visitors to use the site navigation to find what they’re looking for. This can help keep them on your site instead of leaving due to frustration.
That gives us a more informative error page.
Editing a Custom Error Page in cPanel
In cPanel, you can modify custom error pages. To edit a page, simply click on the corresponding error code link.
Deleting Custom Error Pages in cPanel
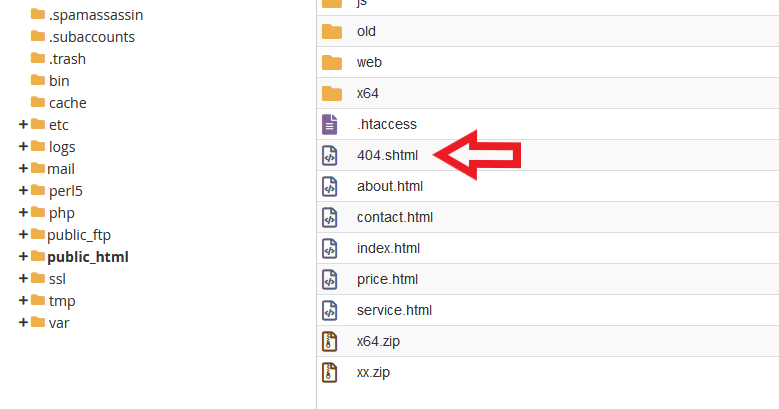
For custom error pages associated with your primary domain, you’ll find the file within the root directory, also known as public_html. In this tutorial, we’ll be utilizing the file editor in cPanel. To delete a file, right-click on its name and select the “Delete” option from the menu.
For Mac users, holding down CMD while clicking will reveal the option to delete.
Upon deletion of the file, visitors to your site will be presented with the generic server error page instead of the custom one.
A Custom Error Page for Every Occasion
Visitors typically encounter server errors labeled as 400 and 500 series, which encompass a range of issues. While many of these codes correspond to less common problems, it’s beneficial to familiarize yourself with the entire list. This knowledge is especially useful if there’s a possibility your site might trigger one of these rarer errors.
To design a custom error page for one of these less frequently encountered errors, you should select the “Show All HTTP Error Status Codes” option.
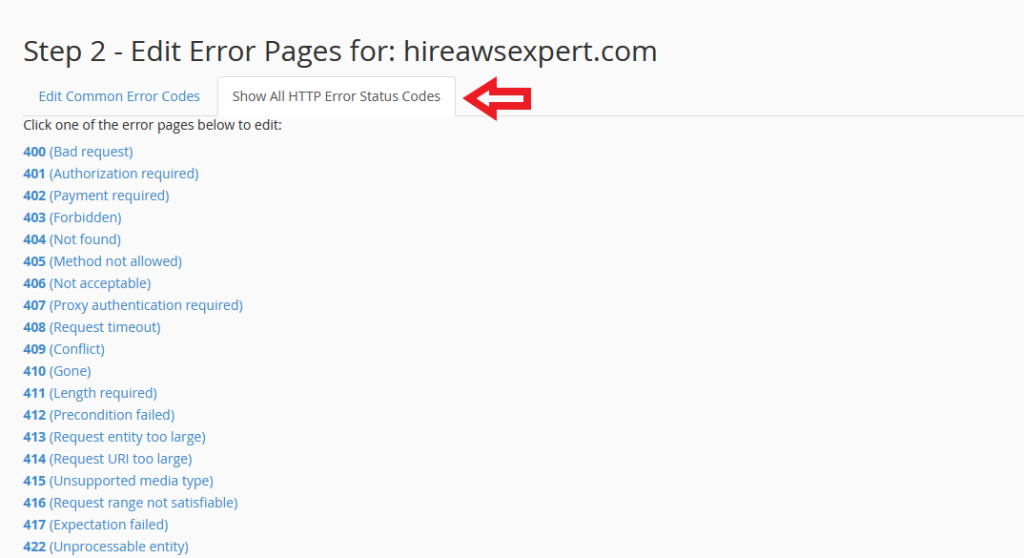
Activating this option will reveal a comprehensive list of HTTP error status codes.
Testing Your Custom Error Pages
It’s important to test your custom error pages to ensure they display correctly. You can do this by:
- Accessing a non-existent page on your website to trigger a 404 error.
- Configuring directory permissions incorrectly to trigger a 403 error.
- Intentionally causing a server error (for advanced users) to trigger a 500 error.
Conclusion
Custom error pages offer a way to turn potentially frustrating experiences into opportunities for positive engagement with your visitors. By following the steps outlined in this guide, you can create informative, helpful, and brand-aligned error pages that enhance the user experience on your website. Remember, the goal is to assist your visitors in finding their way back to your content, even when errors occur.